So, if you are trying to set up SMTP ( Simple Mail Transfer Protocol ) on your WordPress website then this article is perfect for you. You need also to configure it for the different types of business email, not only Namecheap such as GoDaddy, SiteGround, Bluehost etc. This configuration is very similar to other domain registrars. Today I am going to illustrate to you how to configure SMTP on your WordPress website using the Namecheap platform.
I hope, you have already purchased a business email address from Namecheap. Now login to your Namecheap dashboard, go to “Private Email” then click on the “Manage” button which email you would like to configure. Check the below screenshot –

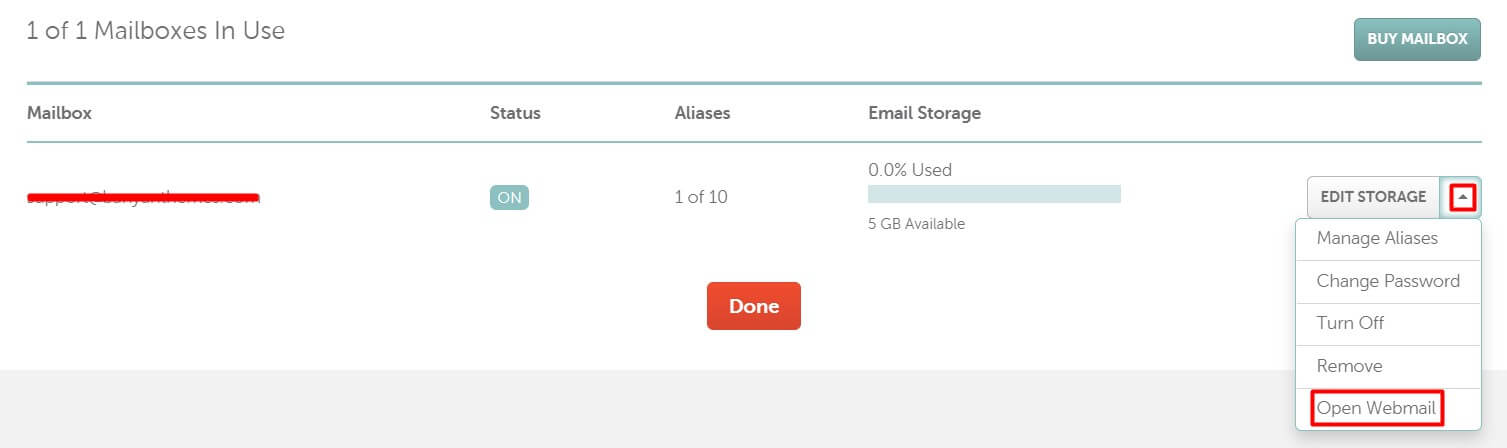
Go to the bottom of the page, you will get “Mailbox”, hit the “Edit Storage” dropdown icon then click on the “Open Webmail” link. It will redirect to you Privateemail ( dot ) com. By login in the Privateemail, you can check your email and other information.
Configure SMTP to Work Properly With the “Contact Form 7” Plugin
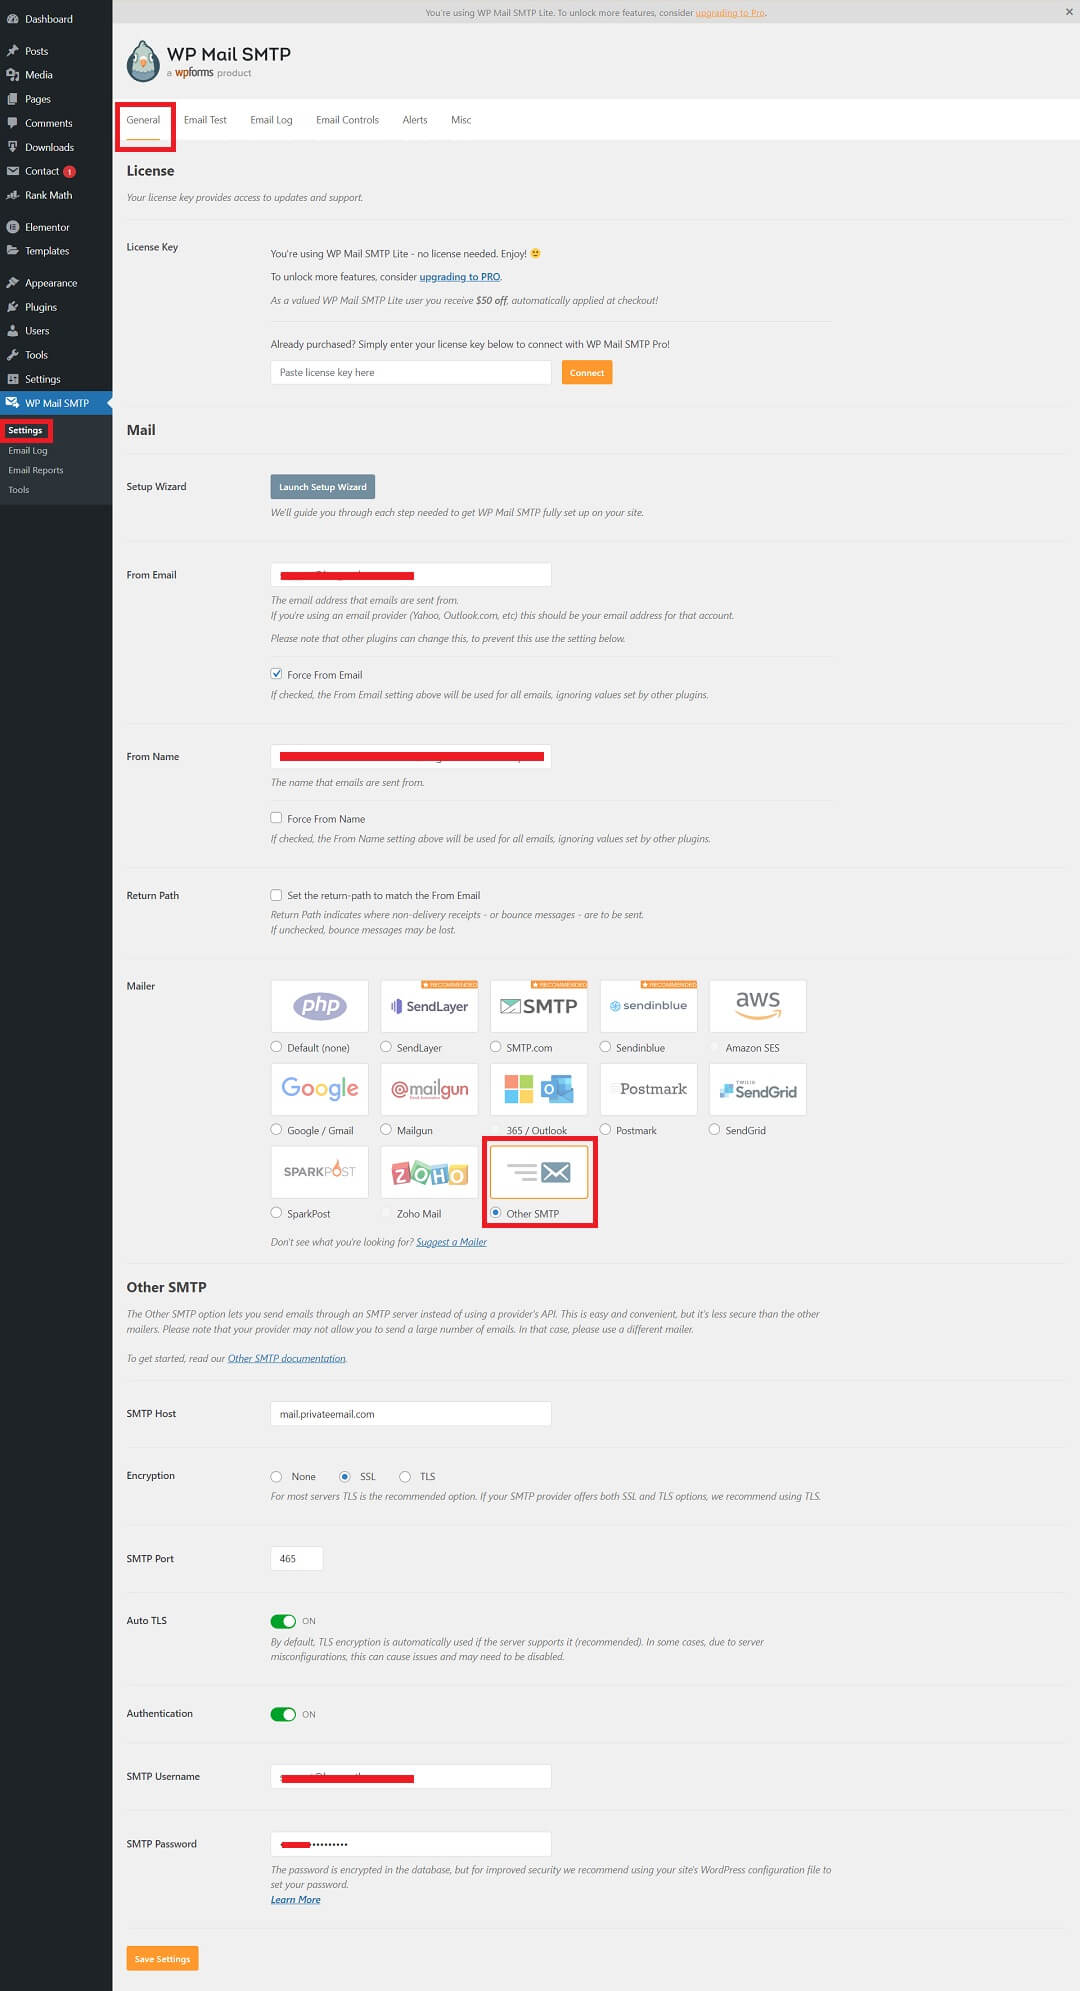
For example, you need a contact form for your WordPress website and you have installed a plugin name “Contact Form 7” everything is configured properly but when a user submits the form it is demonstrating a success message but still no email reached the inbox. Now to solve this problem you need to configure SMTP. To do this need to install another WordPress plugin name “WP Mail SMTP” after installing this plugin go to settings under “WP Mail SMTP” from the left sidebar, go to “General” and fill up all essential fields.
- From Email: support@example.com
- From Name: It could be your website title
- Mailer: Other SMTP
- SMTP Host: mail.privateemail.com ( it is the Incoming/outgoing servers name )
- Encryption: SSL/TLS
- SMTP Port: 465 ( this field will fill up automatically when inputting SMTP Host )
- Auto TLS: On
- Authentication: On
- SMTP Username: support@example.com ( your business email )
- SMTP Password: this email password
- Save Settings.
Please check below screenshot –
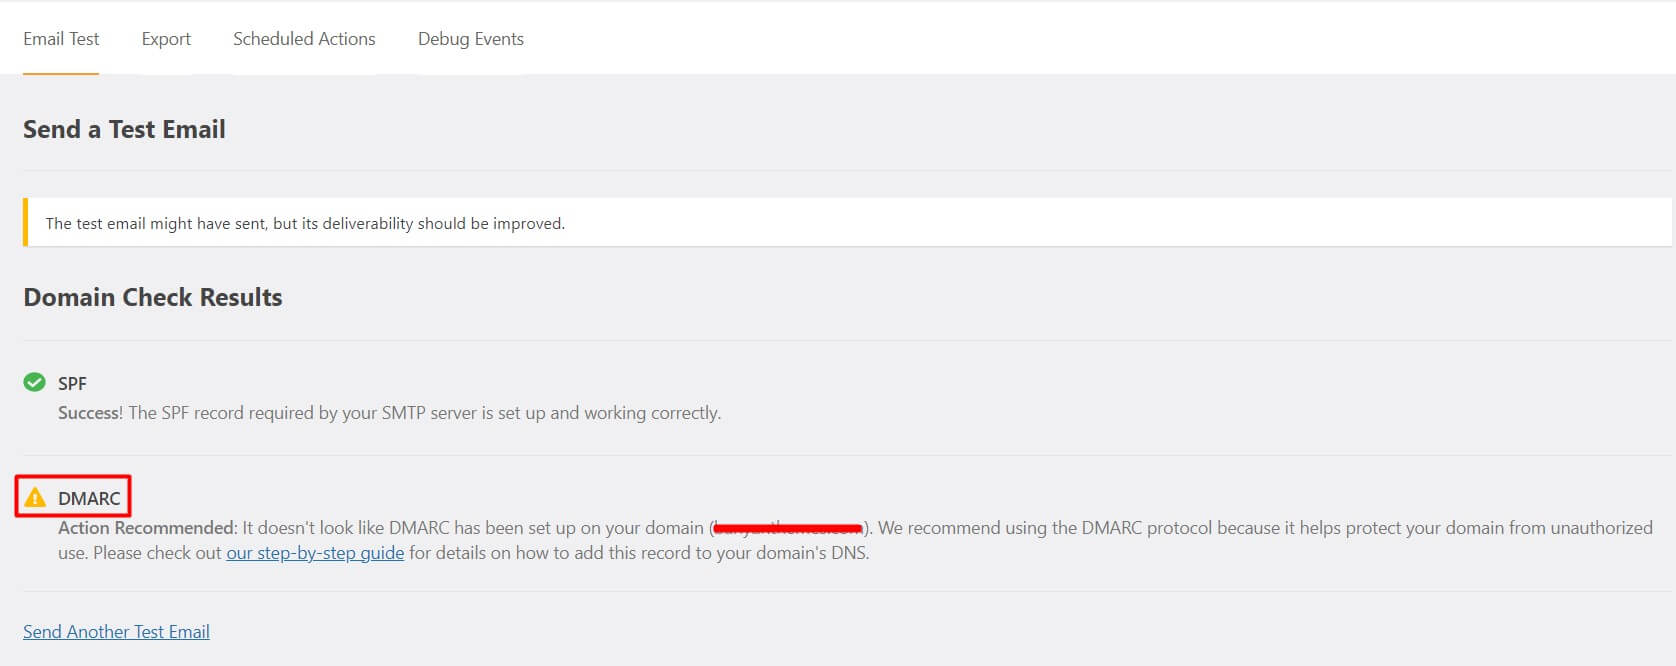
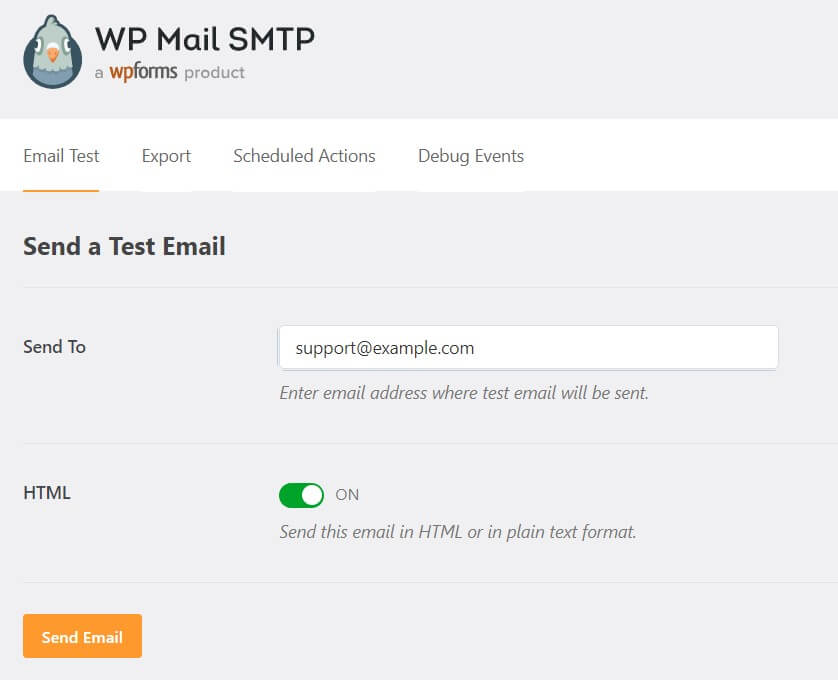
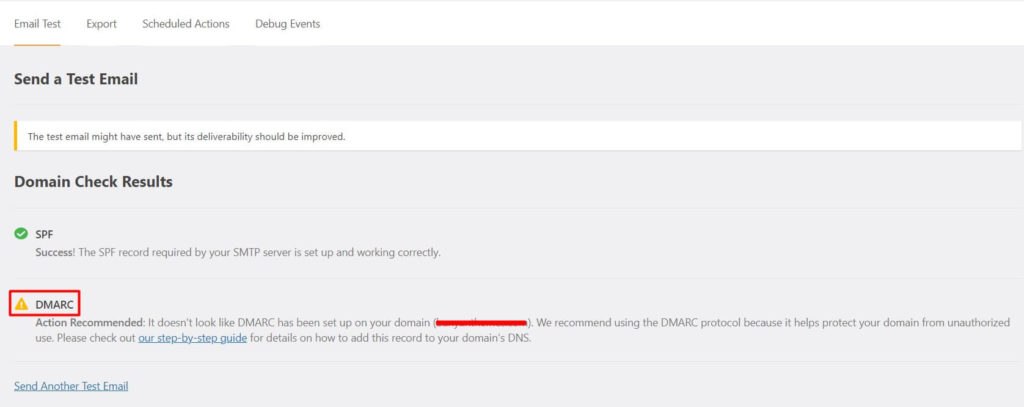
Now it is time to test email. Go to “Email Test” input your business email and send. Verify your inbox from ( https://privateemail.com/ ). I hope you have received this email. Almost configured SMTP on your WordPress website.
But a warning can arise which is the “DMARC” protocol if you didn’t configure DMARC from your domain before. You might check how to add DMARC record to your domain’s DNS.
Note: WP Mail SMTP is not only a plugin to configure SMTP. There have more SMTP WordPress plugins through the WordPress plugin directory such as Easy WP SMTP, HubSpot WordPress Plugin, Gmail SMTP, SMTP Mailer etc.