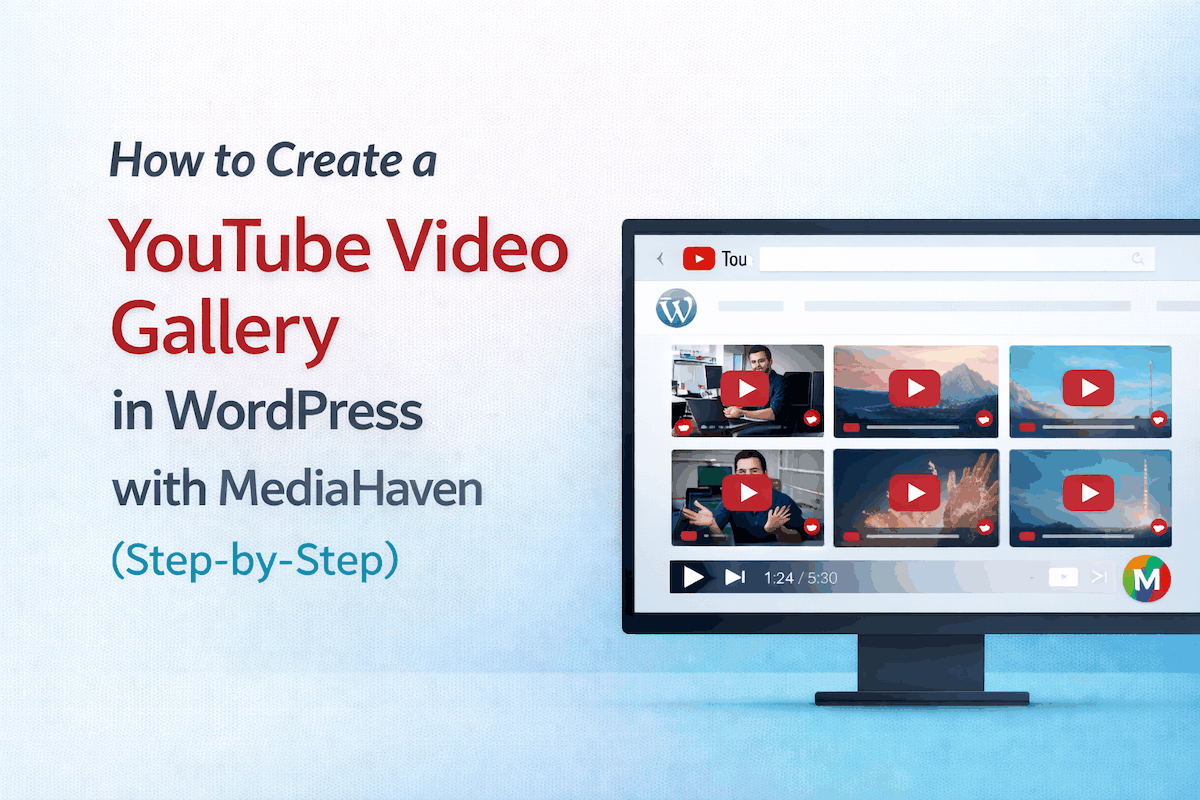
If you just installed MediaHaven Lite and you’re staring at a blank admin screen wondering where to start — this guide is for you. We’ll walk through every step from plugin activation to publishing your first live video gallery, in plain English, with no steps skipped.
By the end of this tutorial you’ll have:
- MediaHaven fully configured with your settings
- Your YouTube API key connected (if you want YouTube feeds)
- At least one video added to your library
- A fully responsive gallery shortcode embedded on a live page
Let’s go.
Step 1: Install and Activate MediaHaven Lite
Option A — Install from WordPress.org (Recommended)
- Log in to your WordPress dashboard
- Go to Plugins → Add New Plugin
- In the search bar, type MediaHaven
- Find MediaHaven – Video Gallery & HLS Player With YouTube and TikTok by WPninjaDevs
- Click Install Now
- Click Activate
Option B — Upload Manually
- Download the ZIP file from wordpress.org/plugins/mediahaven-lite
- Go to Plugins → Add New Plugin → Upload Plugin
- Choose the ZIP file and click Install Now
- Click Activate Plugin
After activation, WordPress will automatically redirect you to the Setup Wizard. Don’t skip it — it sets up your core configuration in under 2 minutes.
Step 2: Complete the Setup Wizard
The Setup Wizard is a guided onboarding screen that walks you through the essential configuration MediaHaven needs before you start creating galleries. It includes automatic server and performance checks, sample shortcode templates, and optional YouTube API connection.
The wizard covers:
Basic Settings — your plugin’s general preferences, including rewrite slug options for your video URLs (e.g., /video/ instead of /?post_type=mhpro-video).
YouTube API Key — if you plan to display YouTube channel feeds or playlists, paste your API key here. We’ll cover how to get this key in Step 4. If you’re only embedding individual videos (YouTube, Vimeo, TikTok, etc.) or self-hosted/HLS content, you can skip this for now.
Sample Content — the wizard can install sample videos and a demo shortcode so you can see how the gallery looks on your site immediately.
Click through each wizard step and hit Finish when done. You can revisit any setting later under MediaHaven Lite → Settings.
Step 3: Explore the Admin Menu
After setup, you’ll see the MediaHaven Lite menu in your WordPress sidebar. Here’s what each section does:
Videos — your video library. Every video you want to display (whether YouTube, Vimeo, TikTok, HLS, or self-hosted) is managed here as individual “video posts.”
Views — your gallery shortcodes. A “View” is a gallery configuration — layout type, source, display options, styling. One View = one shortcode.
Categories — organize your videos into categories. Categories can be filtered in Pro, displayed as visual category grids, and used for SEO-friendly archive pages.
Tags — same as categories but for tags. Used for filtering, browsing, and structured organization of large video libraries.
Settings — global plugin configuration: API keys, rewrite slugs, caching, and performance options.
Global Styles — set default typography, colors, and fonts that apply across all galleries and pages like (archive, category, search, tags etc) unless overridden per-shortcode.
Step 4: Get Your YouTube API Key (For YouTube Feeds)
Skip this step if you’re not using YouTube channel feeds or playlists. Individual YouTube video embeds don’t require an API key.
MediaHaven pulls YouTube channel and playlist data using Google’s official YouTube Data API v3. The API key is free and takes about 3 minutes to create.
How to create your YouTube API key:
- Go to console.cloud.google.com
- Click Select a project at the top, then New Project — give it any name (e.g., “MediaHaven Site”)
- Click Create
- In the left sidebar, go to APIs & Services → Library
- Search for YouTube Data API v3 and click on it
- Click Enable
- Go to APIs & Services → Credentials
- Click + Create Credentials → API Key
- Your key is generated — copy it
Add the key to MediaHaven:
- In WordPress, go to MediaHaven Lite → Settings → API Settings
- Paste your YouTube API key in the YouTube API Key field
- Click Save
Pro tip: MediaHaven supports multiple API keys with automatic rotation. If you run a high-traffic site or multiple YouTube galleries, add 2–3 API keys to prevent hitting Google’s daily quota limits. Simply add keys one per line in the API key field.
Step 5: Add Your First Video
Go to MediaHaven → Videos → Add New.
You’ll see a video editor with several sections:
Title — the video title that appears on your gallery cards and single video pages. Write something descriptive for SEO.
Description — the video description or excerpt. Displayed below the title on the gallery card (can be toggled off) and on the single video detail page.
Video Source Settings — this is where you tell MediaHaven where your video lives. Click the source dropdown and choose from:
| Source Type | What It Is |
|---|---|
| YouTube | A single YouTube video (paste the video ID) Ex: GzWzo0AXmTg Just Video ID from YouTube URL – https://www.youtube.com/watch?v=GzWzo0AXmTg |
| Vimeo | A single Vimeo video ID from URL Ex: 1066526515 Just Video ID from TikTok URL – https://vimeo.com/1066526515 |
| TikTok | A TikTok video ID from URL Ex: 7561586610492558647 Just Video ID from TikTok full URL – https://www.tiktok.com/@microsoft/video/7561586610492558647 |
| A Facebook video ID from URL Ex: 8694106924030928 Full URL format – https://www.facebook.com/plugins/video.php?href=https://www.facebook.com/watch/?v=8694106924030928 | |
| An Instagram video URL Ex: DFvATvSAwTD Full URL format – https://www.instagram.com/p/DFvATvSAwTD/embed | |
| A LinkedIn video ID from URL Ex: 7310440559813238785 Just Video ID from LinkedIn full URL – https://www.linkedin.com/embed/feed/update/urn:li:ugcPost:7310440559813238785?compact=1 | |
| Twitch | A Twitch video ID from URL Ex: 2413168507 Full URL format – https://player.twitch.tv/?autoplay=false&parent=demo.mediahaven.io&video=2413168507 |
| Wistia | A Wistia video ID from URL Ex: eozcd9l624 Full URL format – https://fast.wistia.net/embed/iframe/eozcd9l624 |
| Dailymotion | A Dailymotion video ID from URL Ex: x9prt02 Full URL format – https://www.dailymotion.com/embed/video/x9prt02 |
| Rumble | A Rumble video ID from URL Ex: v6p098w Full URL format – https://rumble.com/embed/v6p098w |
| HLS | A self-hosted HLS M3U8 stream URL Ex: https://example.com/stream.m3u8 |
| Self-hosted | An uploaded MP4 or video file URL |
Thumbnail / Poster Image — upload a custom thumbnail. For YouTube videos, MediaHaven can pull the YouTube thumbnail automatically. For other sources, upload your own image. Thumbnails are lazy-loaded and optimized automatically.
Categories and Tags — assign your video to one or more categories and tags. This is important for organizing large libraries and enabling filtered browsing.
Subtitles — upload a VTT or SRT subtitle file if your video has captions. Assign a language label (e.g., “English”, “Bengali”). Multiple subtitle tracks per video are supported.
Publish — once you’ve filled in the details, click Publish in the top right.
Repeat for each video you want in your library. There’s no limit on the number of videos you can add.
Step 6: Configure Global Styles
Before creating your gallery, take 2 minutes to set your Global Styles — these become the default look for all your galleries unless you override them per-shortcode.
Go to MediaHaven → Global Styles (also accessible from the Views editor as a Style tab).
Typography — choose a Google Font for your video titles and descriptions. MediaHaven loads Google Fonts with proper performance optimizations.
Colors — set your primary color (used for hover states, active elements, and accents), text colors, and background colors.
Card Spacing — define padding and gap between video cards in your galleries.
These global styles keep your galleries visually consistent across your entire site without needing to re-configure each one individually.
Step 7: Create Your First Gallery (View)
This is where MediaHaven’s power really shows. Go to MediaHaven Lite → Views → Add New.
Basic Settings Tab
View Name — give your gallery an internal name (e.g., “Homepage YouTube Feed” or “Tutorial Videos Grid”). This is for your reference — it doesn’t show publicly.
Feed Source — choose what videos this gallery pulls from:
- All Videos — shows every video in your library
- Category — shows videos from a specific category
- Tag — shows videos with a specific tag
- YouTube Channel — pulls live from a YouTube channel ID
- YouTube Playlist — pulls live from a YouTube playlist ID
- Taxonomy — shows videos from multiple terms
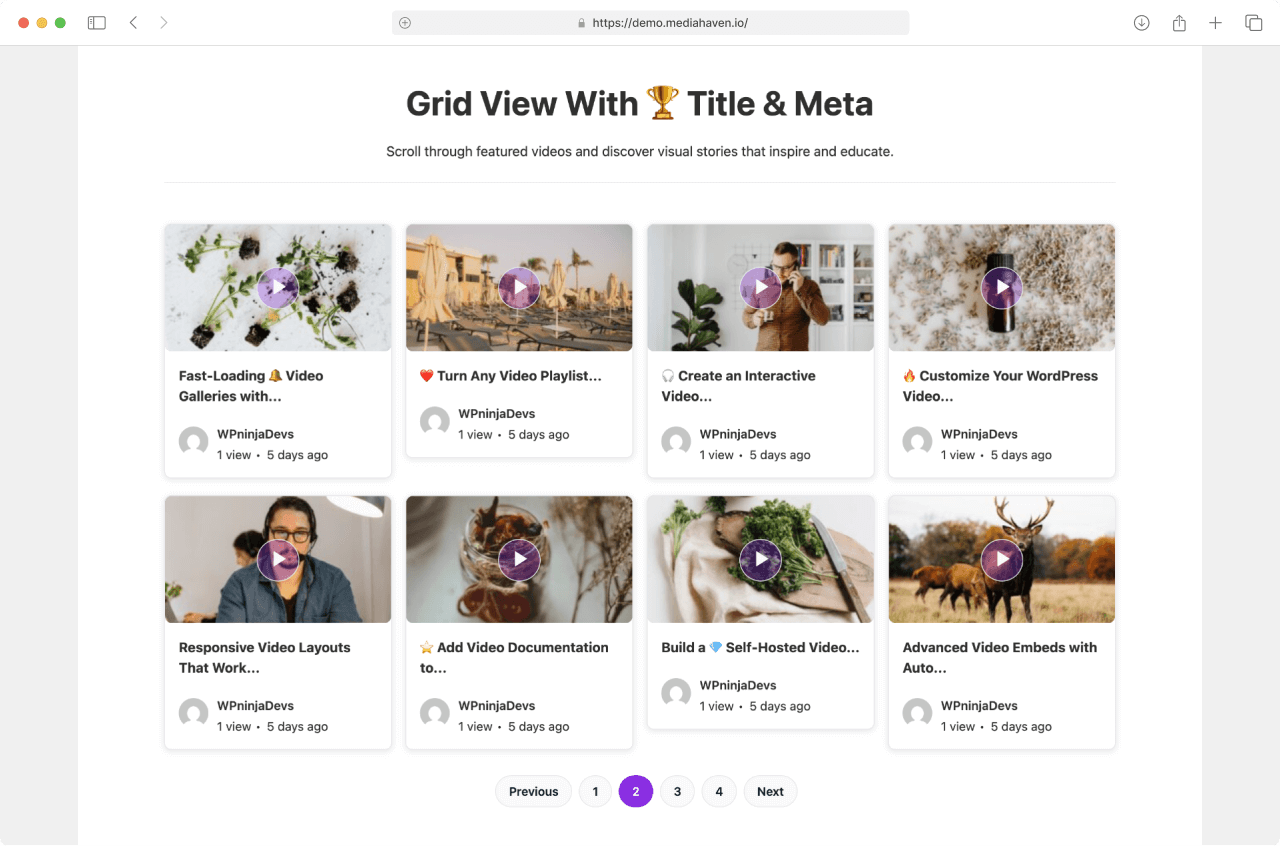
Layout — choose your gallery layout:
- Grid — a standard responsive column grid. Best for general video libraries.
- Carousel — a horizontal sliding carousel with navigation arrows and swipe support. Best for featured video sections.
- Multi-row Carousel — a carousel that displays multiple rows simultaneously. Best for compact displays with many videos.
Columns — set column count per device breakpoint:
- XS (extra small — mobile phones)
- SM (small — large phones / small tablets)
- MD (medium — tablets)
- LG (large — laptops)
- XL (extra large — desktops)
For example, setting XS=1, SM=1, MD=2, LG=3, XL=4 gives you a classic responsive grid that stacks to a single column on mobile.
Pagination — choose how users browse through large video libraries:
- Numbered Pagination — standard page numbers below the gallery
- Load More Button — an AJAX button that appends more videos without a page reload
- Infinite Scroll — videos load automatically as users scroll down (Pro)
Videos Per Page — how many videos to show before pagination kicks in.
Display Options Tab
This is where you control what appears on each video card. Toggle each element on or off:
- Video thumbnail / poster image
- Video title
- Author name
- Author avatar
- Publish date
- View count
- Comment count
- Like / dislike thumbs
- Description excerpt
- Category labels
- Tag labels
Minimalist galleries (thumbnail only, no text) work great in hero sections or portfolios. Full-detail cards (thumbnail + title + meta + excerpt) work well for blog-style video libraries.
Style Tab
Override global styles for this specific shortcode:
- Card background color
- Title color and font size
- Meta text color
- Card border radius and box shadow
- Hover effects
Header Tab
Add an optional section header above your gallery:
- Gallery title
- Subtitle or description
- “View All” link button (customize the label and URL)
- Right-side header button (Pro)
Step 8: Preview and Copy Your Shortcode
Once you’ve configured your gallery, click Save. MediaHaven generates a unique shortcode for this gallery — something like:
[wpnd_mhpro_views id="5"]You’ll see this shortcode displayed prominently in the View editor. Click the copy icon next to it.
Live Preview: Before embedding, you can preview your gallery directly in the View editor using the Shortcode Live Preview panel. This shows you exactly how your gallery will render — layout, cards, spacing, colors — without needing to visit the frontend. Adjust settings, click save, and the preview updates in real time.
Step 9: Embed the Gallery on Your Site
Now take your shortcode and place it wherever you want the gallery to appear.
In the Gutenberg Block Editor:
- Edit the page or post where you want the gallery
- Click the + to add a new block
- Search for MediaHaven and select the Shortcode View block
- In the block settings, choose your gallery from the dropdown
- The gallery renders as a live preview right inside the editor
In the Classic Editor:
- Edit your page or post
- Switch to the Text tab
- Paste your shortcode:
[wpnd_mhpro_xxx id="5"] - Switch back to Visual — you’ll see a shortcode placeholder
- Save and view the page
In Elementor:
- Add a Shortcode widget to your page layout
- Paste the MediaHaven shortcode into the widget
- The gallery appears in Elementor’s preview
In Divi, WPBakery, Beaver Builder, and other builders: Add a Text/Shortcode element and paste the shortcode. It works in any builder that supports shortcodes.
You can embed multiple different galleries on the same page — each with its own layout and source. MediaHaven only loads its CSS and JavaScript on pages where its shortcodes actually appear, so there’s no performance cost on pages without galleries.
Step 10: Test and Verify
After embedding, visit your live page and verify:
✓ Gallery loads without visible errors
✓ Thumbnails are displaying and lazy-loading correctly
✓ Videos play when clicked
✓ Gallery is responsive — check on mobile and tablet
✓ View counter increments when a video is watched
✓ Like/dislike buttons respond to clicks
✓ Keyboard shortcuts work (Space to play/pause, F for fullscreen)
If anything looks off, go back to your View editor and adjust settings. The Live Preview makes this fast.
Bonus: Export and Import Your Settings
If you’re managing multiple WordPress sites or want to back up your gallery configurations, MediaHaven’s built-in export/import tool (shown in screenshot-22) handles this cleanly.
Go to MediaHaven Lite → Settings → Export/Import.
- Export — downloads your View configurations and global settings as a JSON file
- Import — upload a JSON file to restore or clone configurations on another site
This is particularly useful for agencies building similar gallery setups across multiple client sites.
What’s Next: Upgrading to Pro
Once your basic gallery is running, you’ll naturally start hitting use cases that Lite doesn’t cover:
- Need visitors to filter videos by category or search? → Ajax Live Filter (Pro)
- Want to run ads inside your videos? → VAST Ad System (Pro)
- Want clickable chapters in long tutorials? → Video Chapters (Pro)
- Want full drag-and-drop control over card layout? → Visual Order Builder (Pro)
- Want WebP image conversion for extra speed? → Image Optimization Pro
- Unlimited possibilities with A lot of style options
All Pro features are available from $79/year for a single site at mediahaven.io/pricing. There’s a 14-day money-back guarantee — no risk.
Summary
MediaHaven Lite goes from installation to a live, SEO-optimized, fully responsive video gallery in about 2 minutes. The setup wizard, intuitive View builder, live preview, and shortcode system make it approachable for non-technical users while giving developers full flexibility through custom CSS and shortcode options.
👉 Download MediaHaven Lite free
Have a question about any step in this guide? Drop it in the comments and we’ll answer within 24 hours.